
Part 1
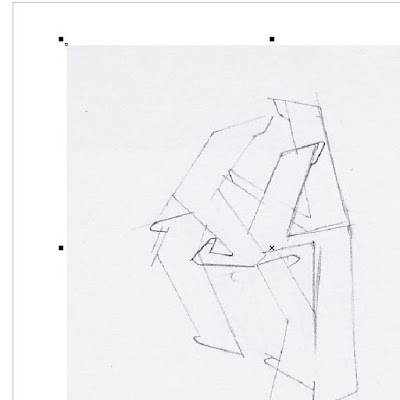
You will see how to make graffiti using Photoshop, Corel . I divided this tutorial into two parts because I want to show how this can be done using these two programs. On Youtube certainly seen a lot of interesting tutorials graffiti made without any templates and similar stuff. I will show how a person beginner can do this by using these two programs, paper and pencil. The best start is from your project. Draw it and scan (unless this is that you can not help). Once we have scanned your profile is open Corel `ai choose File-> New (Ctrl + N). Show us a clean sheet of A4 paper. We choose again File-> Import (Ctrl + I) and choose your scan project. We press our import and set a sketch on a sheet.
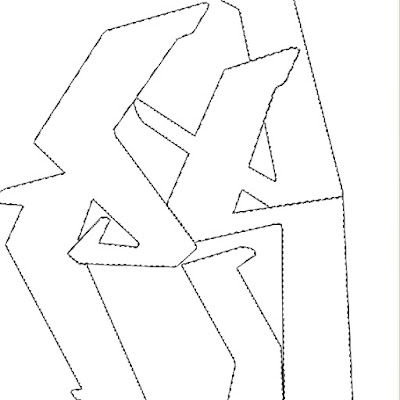
Now select the pen tool from the toolbar on the left
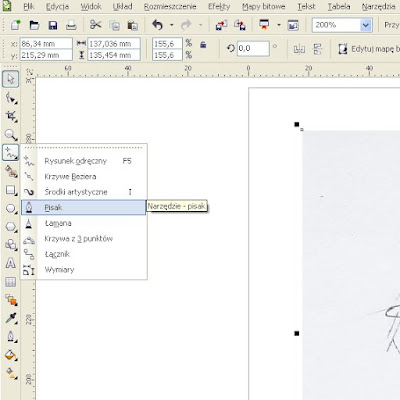
And mark our sketch around like me in the picture (it's important that each line was connected to each other)
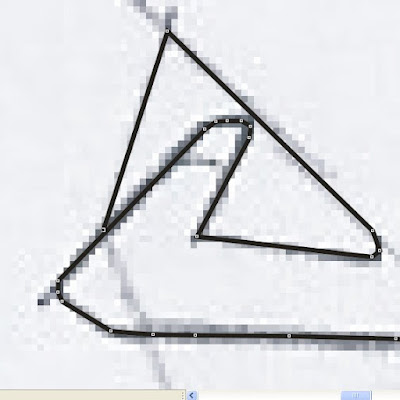
As I have already done this, we are on our click it to a mouse with the sketch so that the stated
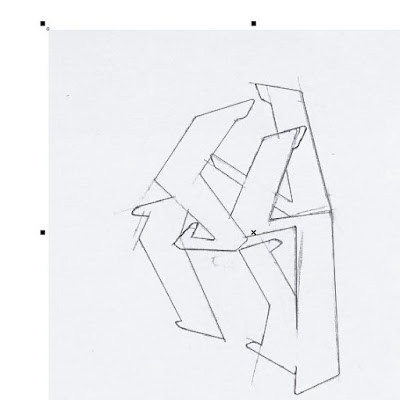
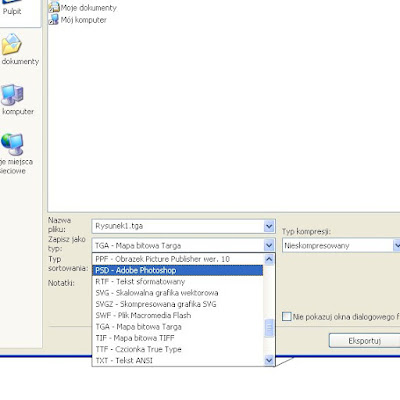
Click Delete on the keyboard and we see only an outline, which we did in Corel `u. Now choose File-> Export (Ctrl + E), and we see the Export dialog. We see this option Save as type, and there we have to choose Adobe Photoshop PSD and press Export
Part 2
Now go to Part Two. Open up Photoshop our sketch of the Corel` s or File-> Open (Ctrl + O). As I have it open, we can choose Image-> workspace size (Alt + Ctrl + C). Show us such a window
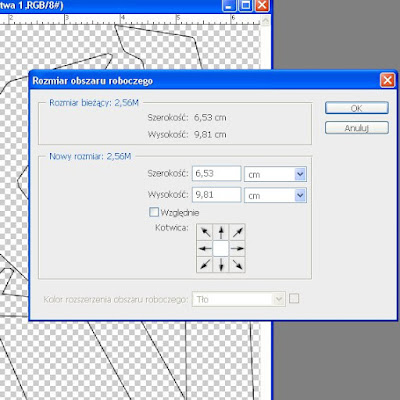
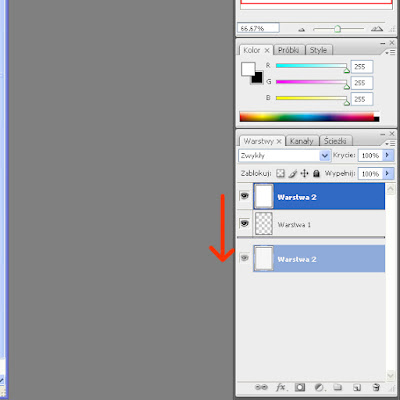
Enter it about a cm more than (for example, in my case, width 6.53 - I wrote 8, height 9.81 - I wrote 11), and we see that our working area has increased. Now, to help us a bit of work to select the Layers palette - Create a new layer, take a bucket and fill it in a color such as white. We see that our new layer covered her our sketch, because the layer with the color white drag down
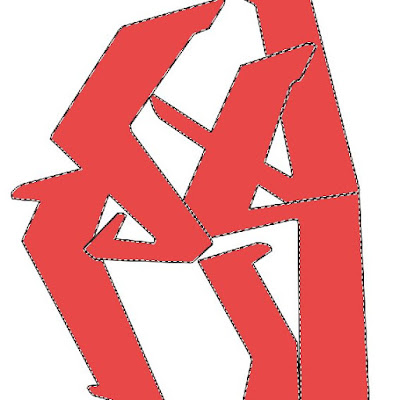
Now we see our sketch. Select the wand tool and select your sketch in the middle. (Make sure you have selected layer with the sketch.) If you have more than one letter as I choose from the top bar Add to selection
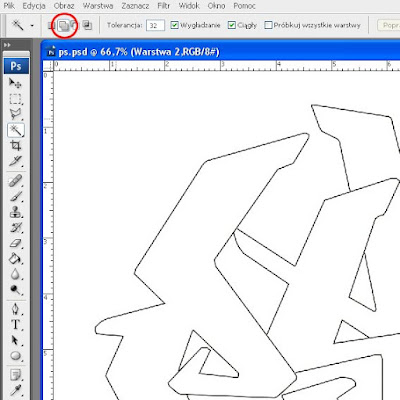
and we should have such a selection
add another layer by clicking on the Create a new layer. Make sure that our layer is selected and fill me any color
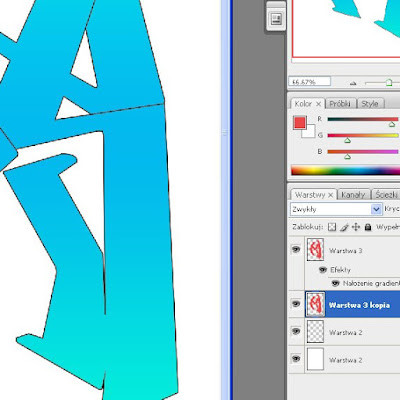
How do we do now is choose Ctrl + D and uncheck our zaznaczenie.Klikamy right-click on this layer and choose Duplicate Layer option. We'll show the same layer with a note ... a copy. Now we return to our layers of filling but not the only copy of the original, and click the right mouse button on the layer and choose blending. We will open this window, called Layer Style.
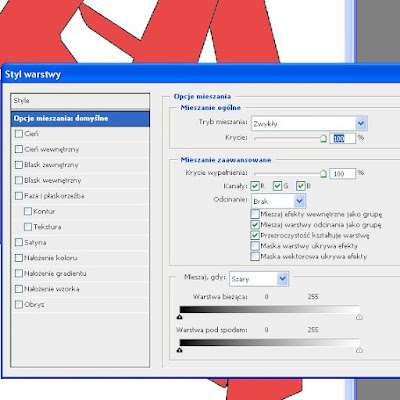
in this window you can set a lot of interesting things to happen but I chose only the gradient. Then select Gradient Overlay and set yourself any color!
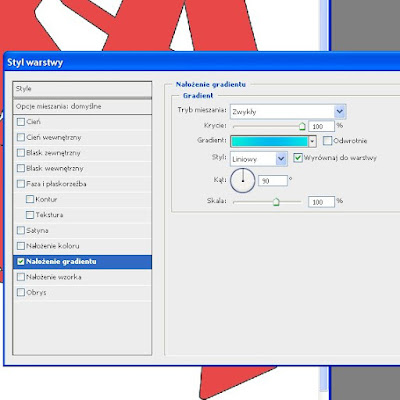
Click OK but we see that our image has not changed. So that our copy is the layer above it so we have to drag the original layer and should be all right.
Now click on our layer with the copy and it only select the whole operation and we in the window of our sketch. If we selected this layer is to click on your drawing and drag it down the left for example: D just like in the picture
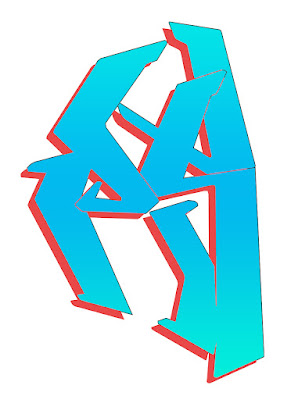
We did not but a shadow of a color we wanted so we set the color such as black, choose the bucket tool and fill our shadow on the black.
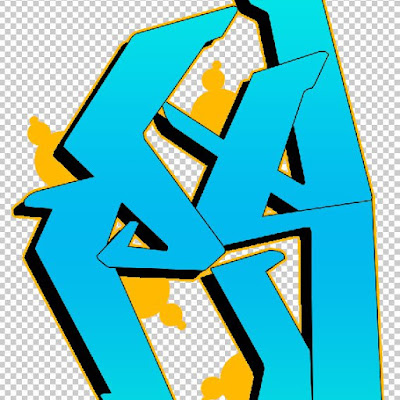
Now hide the layer with your background (the color white), and click the right mouse button on the layer, eg with filling and choose Bind visible.
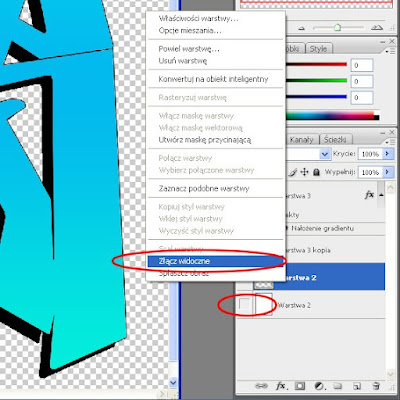
And we have joined the layers together. Select Options, click on our mixing layer and select the outline. Set yourself any color, for example, choose 5 pixels and click OK
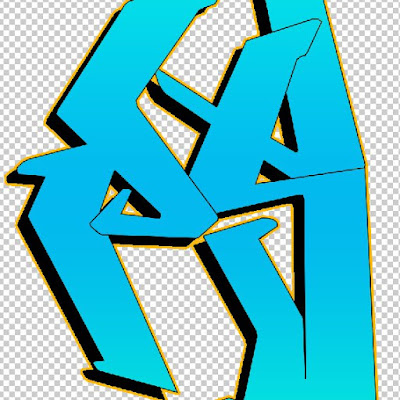
We shall have to make some themes, such as the famous Bombla. Select the new layer of brush and with the same color as our outline. (You can do this using the dropper (I)) I do on a new layer of dots
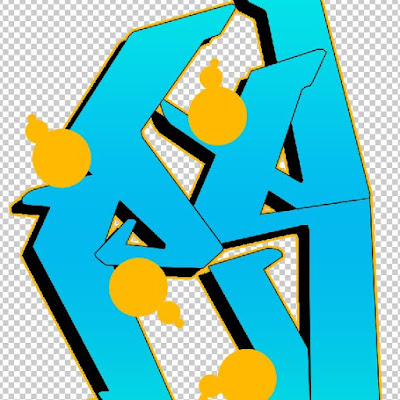
We see that our Bombla are but, not under our layer, so drag the layer with the pattern below, and we have almost finished effect
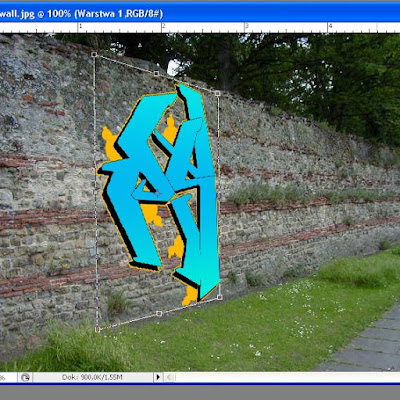
We can put graffiti on some wall. Again, click the right mouse button on the layer and choose our options Bind visible. In google looking for some pictures of the wall. Save it and open in Photoshop (Ctrl + O). Now we move our graffiti on the picture to the wall by using the shift (v). In my case, the image is too small so I have to somehow fit.
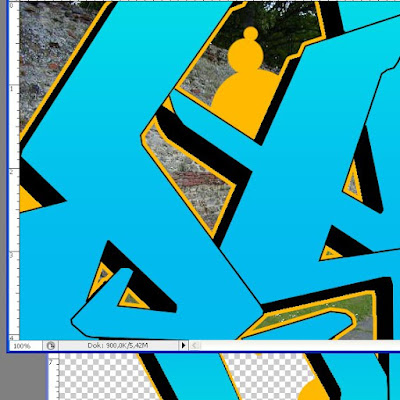
Hit Ctrl + T and we have indicated the graffiti, they must be reduced so that it did make sense. Click on the box to select it, which is located on the corners and using the Shift `u decrease it. Now we have such an effect
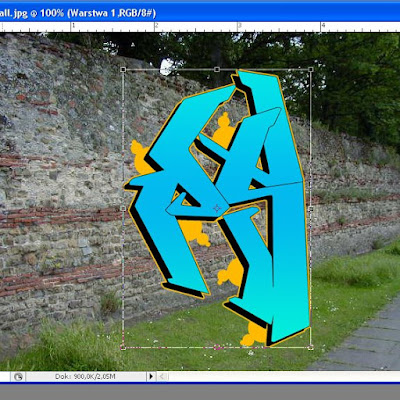
We see that our selection is the next round so now we use the Ctrl key. We keep it and adjust our image to the wall. It was established us something.
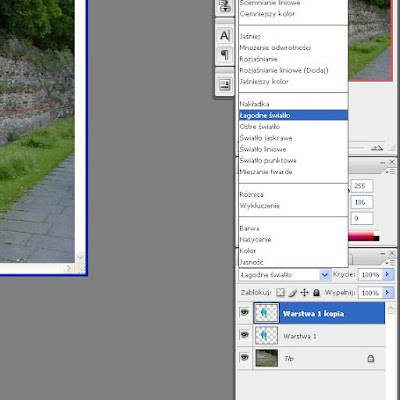
Click Enter to confirm. We are already seeing a nice theme but that it was more realistic to select from the drop-down menu in the Layers palette requires, sharp light or soft light
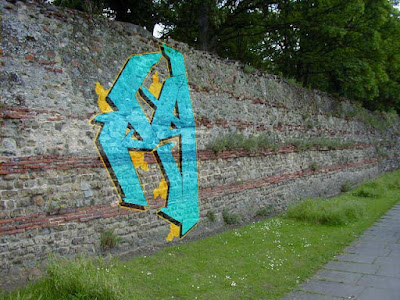
for better effect can be duplicated layers of graffiti that the effect was more realistic, or adjust color balance, or otherwise.
The finished result
Brak komentarzy:
Prześlij komentarz